This is the first step in my The Oracle Database Developer OCI Environment series We begin with setting up the required networking, then the Base Database Service and test the connection.
Create a Virtual Compute Network (VCN)
Navigate to Networking|Virtual Cloud Networks.


As long as you don’t need something else, mostly go with the defaults. Give it a name, choose your compartment and a CIDR block.
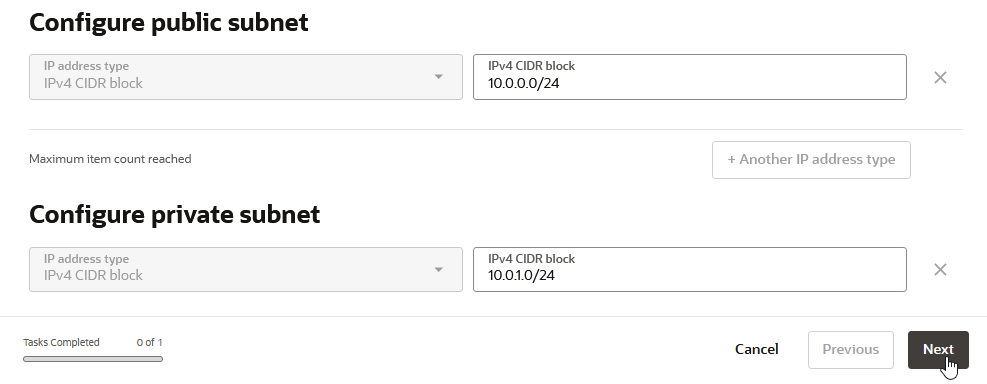
The public
and private subnet address ranges derived from the VCN range should be fine,
click Next.
Double check, click Create and View VCN.


Go to the Security rules tab and select Add Ingress Rules.


The new
rule should appear in the list and should look like the one for SSH, except for
the name and port.

Click on Create
DB system.
For most
settings, I go with the defaults but YMMV, so adapt the settings to your needs.

Give it a
name, the compartment should be pre-selected. Adapt the shape and Edition to
your like.

Upload your existing SSH public key or let OCI create you a new key pair. When you download a new key pair, save it to the .ssh folder in your home directory (any OS), for example on my Windows desktop it is
C:\Users\Arne\.ssh

Choose your preferred license type.


Change the
database name, if you don’t like the auto generated one.
As you probably want to use 23ai, click on Change database image.

When you switch on Display all available versions, you will see that 23.7. is the latest image at the time of writing, though 23.8. is already out. Take this image, we will upgrade it later.

Name the
PDB and enter your new password. Disable b ackups, if you don’t need them. Then
click on Create.

To watch
the progress, click on Work requests.


Check the
listener first, should look good.

Do a direct
connect to the database: sql / as sysdba
Take a look
at your PDB’s: sho pdbs
SQLNet connect to your database
Next lets
check SQLNet connect.


Note down
the Easy Connect string for the CDB.

Navigate to
Pluggable Database und select your PDB.

Also note
down the connect string for the PDB.

From the ssh session connect to the CDB via
sql system/<password>@<quick-connect-string>
So the database
is up and running and we have access via SQLNet.


%20%5BRunning%5D%20-%20Oracle%20VirtualBox.png)
%20%5BRunning%5D%20-%20Oracle%20VirtualBox.png)


